Why we need to integrate the skeleton placeholder –
User experience is what separates an awesome app from a regular app, so here we are going to discuss the topic “Implementing Skeleton Placeholder Screens In React Native” which plays a great role to making a awesome app.
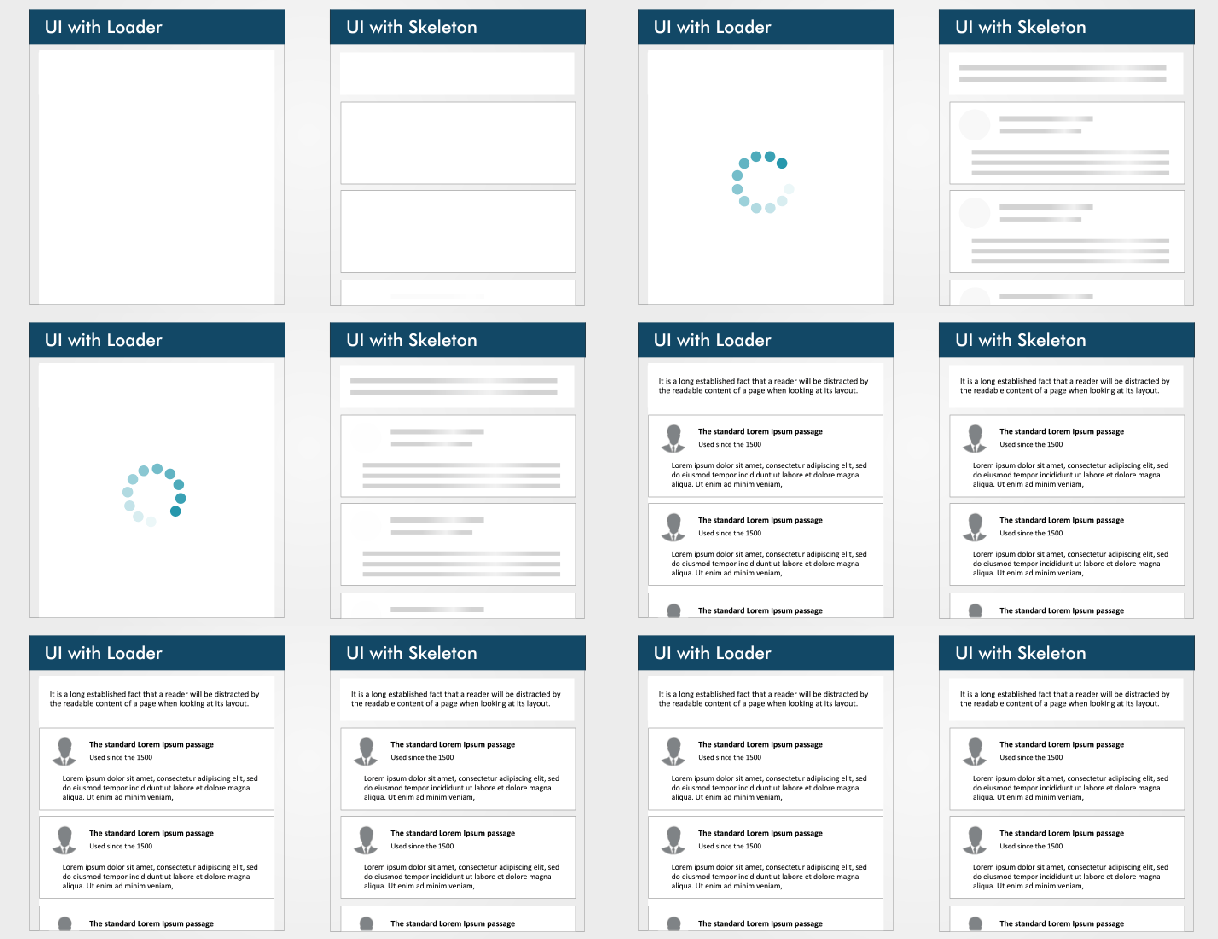
In the below image you see the 2 – different way of loading data now it’s up to you what you like, i am personally like the skeleton view and i think you guys are also like the second one and now days every app like facebook and youtube use the skeleton.
Spinners and loaders are the traditional way to tell the users that data is still loading, so here we replace the spinner to skeleton.
Skeleton screens offer a better user experience by reducing loading-time.
Output Example –

What Is A Skeleton Screen –
A skeleton screen is a UI that doesn’t contain the data, it shows the page’s layout by showing its elements in a shape of similar to the actual content as it is loading and becoming available.
A skeleton screen is basically a wireframe of that page, with the placeholder boxes for text and images.
What’s Unique About A Skeleton Screen –
A skeleton UI offer the page’s actual UI, so users will understand how fast mobile app will load even before the content has shown up. there are some reasons why you use the skeleton screens in your next project.
- Creating a page’s layout is easier with a skeleton screen,
- Contents loads progressively.
Skeleton screens are also referred as:
- ghost elements,
- content placeholders,
- content loaders.
Companies which use the skeleton –
Blockchain, YouTube, Facebook, Medium, and other big tech companies display skeleton screens while their content loads to boost the UX.
So let’s start to integrate the skeleton screens, follow all the steps carefully for integrating the skeleton placeholder.
Step 1 – Creating a project
Here we need to create the project first for implementing the skeleton.
react-native init skeletonPlaceholderExampleStep 2 – Installing the plugin
Now we need to install the npm plugin for skeleton
npm i react-native-skeleton-placeholderStep 3 – Import the plugin
import the plugin where you want to integrate the skeleton.
import SkeletonPlaceholder from "react-native-skeleton-placeholder";Step 4 – Creating a separate file
Now we create a separate file for skeleton UI design and after creating it import that file where we want to integrate the skeleton.
Creating a file with the name of ProfileSkelton.js in your folder structure.
import React from 'react';
import {View, StyleSheet, Dimensions} from 'react-native';
import SkeletonPlaceholder from 'react-native-skeleton-placeholder';
import {moderateScale} from '../utils/ResponsiveUi';
export const SKELETON_SPEED = 1500;
export const SKELETON_BG = '#dddddd';
export const SKELETON_HIGHLIGHT = '#e7e7e7';
export const MAX_RATING_DEVIATION = 200;
const {width, height} = Dimensions.get('window');

const ProfileSkelton = () => (
  <SkeletonPlaceholder
    speed={SKELETON_SPEED}
    backgroundColor={SKELETON_BG}
    highlightColor={SKELETON_HIGHLIGHT}>
    <View style={{flexDirection: 'row'}}>
      <View style={styles.skeltonImageView} />
      <View style={[styles.skeltonMainView, {top: moderateScale(15)}]} />
    </View>
    <View
      style={[
        styles.skeltonChangePasswordView,
        {top: moderateScale(30), height: height * 0.06},
      ]}
    />
    <View
      style={[
        styles.skeltonMainView,
        {
          width: width * 0.95,
          height: height * 0.06,
          top: moderateScale(250),
          borderRadius: moderateScale(25),
        },
      ]}
    />
  </SkeletonPlaceholder>
);

const styles = StyleSheet.create({
  skeltonImageView: {
    width: width / 5,
    margin: moderateScale(8),
    borderWidth: 0,
    borderRadius: moderateScale(50),
    height: height / 11,
  },
  skeltonMainView: {
    width: width / 1.4,
    margin: moderateScale(8),
    borderWidth: 0,
    height: height / 16,
    elevation: moderateScale(5),
    shadowOpacity: 0.6,
    shadowRadius: 5,
    shadowOffset: {height: 0, width: 0},
    borderRadius: 5,
    // height: globals.screenHeight * 0.24,
  },
  skeltonChangePasswordView: {
    width: '96%',
    margin: moderateScale(8),
    borderWidth: 0,
    borderRadius: moderateScale(5),
    height: height * 0.13,
    elevation: moderateScale(5),
    shadowOpacity: 0.6,
    shadowRadius: 5,
    shadowOffset: {height: 0, width: 0},
  },
});

export default ProfileSkelton;
Step 5 – State Declaration
Here we create a loader and make it true till the content is loading after loading the content or API calling successfully we make the state of that variable false.
constructor(props) {
    super(props);
    this.state = {
      isLoading: true,
    };
  }
Step 6 – Calling ProfileSkelton
Now we call the ProfileSkelton in our profile screen and show it till the data is loaded.
render() {
    const {isLoading} = this.state;
    return (
     <View style={styles.container}>
       isLoading ? (
                  <ProfileSkelton />
                ) : (
                  <View style={styles.container}>
                   <Text>{'Design here what you want to design in your screen'}</Text>
                </View>
    </View>
 )
}
Step 7 – Set The State False
Here we need to set the isLoading state false for stoping the skeleton view, you can set the state of this variable false after API data loading or set a time for it.
  async componentDidMount() {
   setTimeout(() => {
      this.setState({isloading: false});
    }, 1000);
  }
So we completed the react native skeleton placeholder showing which is “Implementing Skeleton Placeholder Screens In React Native“.
You can find my post on medium as well click here please follow me on medium as well.
You can find my next post here.
If have any query/issue, please feel free to ask.
Happy Coding Guys.

Hi, I am a professional Ionic and React Native Pixel Perfect App Designer and Developer, with expertise in Client Communication, Bug Fixing, Third Party Lib, Version Control Tools, Requirement Understanding, and managing teams, I have 6+ years of experience in the same domain as well as in Codeigniter, JS, IoT, and more than 10 other languages. For the last 6+ years, not a single day went without design/development.
Please follow me on Medium: https://nehadwivedi1004.medium.com/


